How to Train an AI Image Generator in 2026
Last Updated: 2026-01-22 18:08:26
Training an AI image generator in 2026 is no longer a research only skill. What used to require deep machine learning knowledge, expensive GPUs, and weeks of experimentation can now be done in under an hour sometimes in less than 20 minutes if you know which path to take.
That said, not all “AI training” is the same. Some methods are fast and cheap but limited. Others offer full control but come with real technical friction. This guide breaks down both routes clearly, based on what actually works today, not marketing promises or outdated tutorials.
This guide covers both approaches: the no code route where you can train a model in 20 minutes for about $3, and the technical path for those who want to dive into DreamBooth, LoRA, and custom training scripts. I'll be straight with you about what works, what doesn't, and where you'll probably get stuck (because I definitely did).
Quick Navigation
If you just want to train a model on yourself and generate AI photos → Jump to Section 3 (the Replicate tutorial)
If you're a developer wanting full control → Start at Section 4 (technical training)
If you're not sure which approach → Keep reading from here
1. What Does "Training" Actually Mean?
Let's clear this up first because there's some confusion out there. When people talk about "training an AI image generator," they're almost never talking about training a model from scratch. That would cost hundreds of thousands of dollars and require a data center.
What we're actually doing is fine tuning an existing model. Think of it like this: Stable Diffusion already knows how to draw people, products, and art styles. You're just teaching it about YOUR specific person, product, or style using 10~50 example images.
What You Can Train (Real Examples)
People/Characters: I trained a model on 18 photos of myself. Now I can generate images of "me" surfing, in a business suit, as a cartoon character you get the idea. The model learned my facial features, and I use a trigger word ("ohw person") to activate it.
Products: E commerce brands are using this heavily. Train on 20 photos of your product from different angles, then generate unlimited marketing shots in various settings. Way cheaper than photoshoots.
Art Styles: This one's interesting. Feed it 30 images of your illustration style, and it'll replicate that style for new subjects. I've seen studios do this with their entire visual brand.
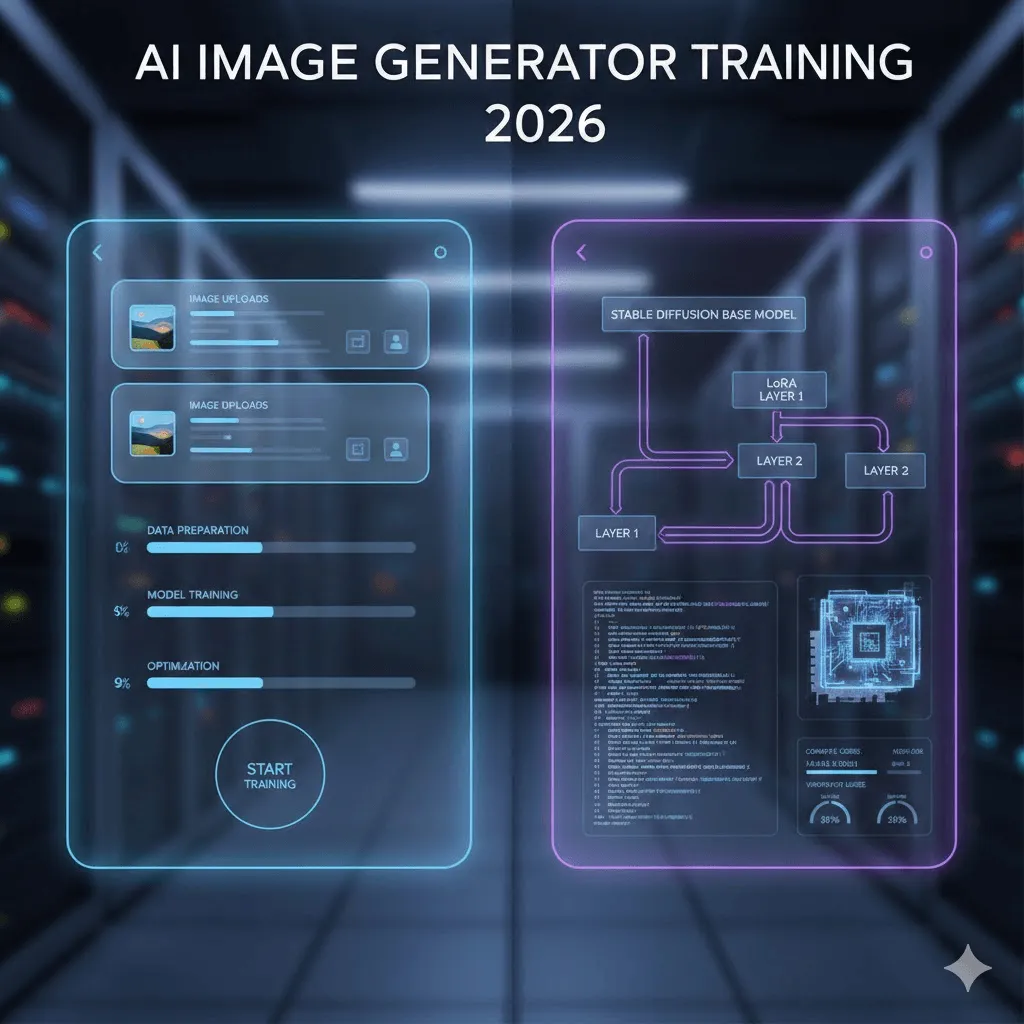
2. Two Paths: Choose Based on Your Situation
Here's the truth: most people should start with no code platforms. I know developers love to DIY everything (guilty), but unless you specifically need custom training parameters or want to learn the underlying tech, the no code route gets you 90% of the results with 10% of the effort.
Factor | No Code Platforms | Technical Route |
Time to first result | 15~30 minutes | 3~8 hours (setup + training) |
Upfront cost | $2~10 per model | $0 (local GPU) or $0.50~5 (cloud) |
What you need to know | Nothing. Literally just upload photos | Python, command line, GPU concepts |
Quality ceiling | Pretty damn good (90% there) | Potentially better with tweaking |
When it makes sense | You want results today, training 1~5 models | Training 50+ models, need exact control, learning ML |
3. The Fast Track: Training with No Code Platforms
I tested five different platforms. Here's what actually worked.
Replicate: The Best Starting Point (What I Used)
Cost: ~$2.50 per training session, about $0.03 per generated image
Time: 18~25 minutes for training to complete
Why Replicate specifically? It's got the best price to quality ratio I found, and the interface doesn't try to be overly clever. You upload images, it trains, done. The documentation is actually readable too, which is saying something.
Step by Step (The Real Process, Not the Marketing Version)
Preparing Your Images:
I used 18 photos of myself. Here's what I learned the hard way: variety matters WAY more than quantity. My first attempt used 30 photos but they were all similar headshots the model basically memorized those exact poses. Second attempt with 18 more varied photos (different angles, lighting, even a few full body shots) worked much better.
Minimum specs: 512×512 pixels, though I used 1024×1024 and it seemed to help. No blurry photos AI can't learn from what it can't see clearly. Avoid heavy filters or those AI smoothing beauty apps. You want the model to learn YOUR actual features, not some smoothed out version.
The Upload Process:
Go to replicate.com, sign up (you'll need to add payment info even for the free tier), navigate to the training section. You can either upload images individually or as a ZIP file. ZIP is faster if you've got more than 10 images.
The Trigger Word (This Is Important):
You need a unique identifier I used "ohw person" (based on my initials). Make it uncommon. Don't use "john" or "photo" because those words already exist in the model's training. I saw someone use "zxc person" and it worked fine. The platform auto generates captions for your images using these triggers, so you don't have to manually label everything.
Training Settings:
Honestly? I just used the defaults. Replicate sets this to ~800 training steps which work for most cases. You can tweak this, but start with defaults. If your results look like they're just copying your training photos exactly (called overfitting), try reducing steps to 500~600 next time.
The Waiting Game:
Training took 22 minutes for my 18 images. You'll get an email when it's done. The progress bar is... optimistic. When it says 5 minutes remaining, it means 10.
Testing Your Model:
This is where it gets fun. Start simple: "a photo of ohw person smiling" (using your trigger word). If that works, get creative: "ohw person as a superhero" or "professional headshot of ohw person in business attire."
Pro tip: Use negative prompts. Add "blurry, low quality, deformed, distorted" to your negative prompt field. This dramatically improved my results. The model sometimes tries to add extra fingers or weird artifacts negative prompts help prevent that.
Other Platforms Worth Knowing About
I tested these but they're better for specific use cases:
getimg.ai: More expensive ($8~10/model) but has a really nice interface and supports FLUX.1 training, which produces noticeably better results for complex scenes. Worth it if you're doing this professionally.
Leonardo.Ai: Geared toward game developers and concept artists. They have a free tier that lets you test things out. The training quality is solid, though the interface is busier than Replicate's.
ImagineArt: Fast training (under 15 minutes) and they've integrated video generation, so you can animate your trained character. Haven't fully tested this but it looks promising.
4. The Technical Route: Training with Stable Diffusion
Okay, so you want to do this the hard way. I respect it. Here's everything I wish someone had told me before I spent a weekend debugging CUDA errors.
Why Bother with Technical Training?
Real talk: most people don't need this. But there are legitimate reasons:
You're training dozens or hundreds of models (no code costs add up)
You need specific training parameters that platforms don't expose
You're working with proprietary data that can't leave your infrastructure
You want to deeply understand how this stuff works (valid reason!)
The Three Main Approaches
DreamBooth: Google's method. You teach the model a new "concept" using 5~20 images and a unique identifier token. Works great for people and specific objects. The original paper showed this working with just 3~5 images of a dog, though in practice I found 15~20 images gives more consistent results.
LoRA (Low Rank Adaptation): This is the game~changer. Instead of modifying the entire massive model file (which can be 5~7GB), LoRA creates a tiny "adapter" file that's only 3~50MB. Training is 3~5x faster and you can run it on a regular gaming GPU. The quality is nearly identical to full fine tuning.
This is what I recommend for 95% of technical users. The combination of DreamBooth + LoRA hits a sweet spot.
Full Fine Tuning: Training the entire model. You need serious hardware (24GB+ VRAM) and honestly, unless you're doing something very specific, LoRA gets you 95% there with 10% of the resources. I tried this once, it took 6 hours on an A100, and the results weren't noticeably better than LoRA.
What You Actually Need
Hardware (The Real Requirements):
Minimum: NVIDIA GPU with 12GB VRAM. I used an RTX 3060 12GB and it worked fine for LoRA training, though it was a bit slow (45 minutes). An RTX 4070 or 3080 with 16GB is the sweet spot for local training.
Don't have a GPU? Cloud options cost $0.50~2 per training session on RunPod or vast.ai. Google Colab Pro ($10/month) gives you unlimited access, though you're in a queue during peak hours.
Software:
Python 3.10+ (3.11 had some compatibility issues when I tried)
PyTorch with CUDA support
diffusers library from Hugging Face
accelerate, transformers, peft for LoRA
The Actual Training Process (DreamBooth + LoRA)
I'm going to skip the basic Python environment setup because if you're reading this section, you probably know how to pip install things. Let me focus on the parts that actually matter.
Installation (one liner that actually works):
pip install diffusers[torch] transformers accelerate peft bitsandbytes
Training Script:
Rather than paste a massive code block, here's what you need to know. Use Hugging Face's official training script from their diffusers repo. It's maintained and actually works. The key parameters:
Learning rate: 1e~4 is the magic number. I tried 1e~5 (too slow) and 5e~4 (model went unstable). Stick with 1e~4.
Training steps: 800~1000 for most cases. Less and it won't learn enough. More and you risk overfitting.
Batch size: 1 or 2. Your GPU probably can't handle more anyway with LoRA.
LoRA rank: 16 or 32. Higher = more capacity but slower. 16 worked fine for faces, I used 32 for complex art styles.
Example command (this is what I actually ran):
accelerate launch train_dreambooth_lora_sdxl.py \
pretrained_model_name_or_path="stabilityai/stable diffusion xl base 1.0" \
instance_data_dir="./my_training_images" \
instance_prompt="a photo of sks person" \
resolution=1024 \
train_batch_size=1 \
learning_rate=1e 4 \
max_train_steps=800 \
use_lora \
lora_r=16 \
output_dir="./output_lora"
This took 38 minutes on my RTX 3060. On a 4090 it would be under 15 minutes. On Google Colab's free T4, expect 90+ minutes.
5. Dataset Prep: This Makes or Breaks Everything
I'm putting this section here because it's genuinely the most important part and most guides gloss over it. Your training quality is 80% determined by your dataset, 20% by your settings.
The Actual Rules (From Trial and Error)
Image count: 15~25 is the sweet spot. I see people recommend 5~10, but that's barely enough unless you're training on something very simple. I also tried 40 images once didn't help,it just took longer.
Resolution matters: 512×512 minimum for SD 1.5, 1024×1024 for SDXL. Don't use phone photos at 4000×3000 and assume they'll work better . Resize them first or the training will be inefficient.
Variety beats quantity: This cannot be overstated. 15 varied images > 30 similar images. Different angles, different lighting, different contexts. If you're training on a person, include some close ups and some full body. Different expressions. Various clothing.
Common Dataset Mistakes (I Made All of These)
Using filtered/edited photos: Instagram filters, beauty mode, heavy editing avoid all of it. The model will learn the filter, not the actual subject.
Inconsistent lighting: Some variance is good, but if half your photos are in bright daylight and half are in dim club lighting, the model gets confused.
Multiple people in frame: If you're training on yourself, crop out other people or the model might blend features. I had one test where the model occasionally gave me someone else's hairstyle because they appeared in 3 of my training photos.
Watermarks and text: The model will learn these. Remove them or crop them out.
6. The Real Cost Breakdown
Let's talk money. Here's what I actually spent testing all this:
Service | Training | Per Image | My Take |
Replicate | $2.47 | $0.028 | Best value |
getimg.ai | $8.00 | $0.05~0.08 | Worth it for FLUX |
Leonardo.Ai | Free~$10 | Varies | Good for testing |
Google Colab Pro | $10/month unlimited | $0 | If doing 10+ models |
RunPod (RTX 3090) | ~$0.80 | $0 (self hosted) | Developer sweet spot |
Local GPU | ~$0.15 electricity | $0 | If you have hardware |
7. Troubleshooting: Stuff That Will Go Wrong
Here are the actual problems I hit and how I fixed them. Saving you some pain.
Problem: The Model Just Copies My Training Photos
This is called overfitting. When I generate "sks person at the beach," it gives me basically my training photo on a beach.
What worked:
Reduced training steps from 1000 to 600. Instantly better. The model wasn't memorizing anymore, it was generalizing. I also tried adding more variety to my training set , which helped too.
Problem: Inconsistent Face/Style
Sometimes it looks perfect, sometimes it barely resembles the training subject.
What worked:
Train longer. I went from 600 to 900 steps. Also, make sure your trigger word is ALWAYS in your prompt. "sks person" not just "person." And increase your guidance scale (CFG) to 8~10 when generating.
Problem: "CUDA Out of Memory"
This one's for the technical folks. Your GPU ran out of VRAM.
Quick fixes:
Set batch size to 1. Enable gradient checkpointing ( gradient_checkpointing flag). Use mixed precision ( mixed_precision="fp16"). If still failing, reduce resolution from 1024 to 768. As a last resort, use use_8bit_adam.
Problem: Training Is Taking Forever
My first training on a 3060 took 2 hours. Way too long.
What helped:
Use LoRA instead of full fine tuning (5x faster). Train at 512px instead of 1024px for testing. Reduce your training steps 800 is plenty for most cases. Or just pay $0.80 for 30 minutes on RunPod with a 4090. Time is money.
8. What About FLUX.1? (The Newer Model)
FLUX.1 came out in mid 2024 from Black Forest Labs (some of the original Stable Diffusion team). It's legitimately better than SDXL in most cases, particularly for:
Following complex prompts accurately
Generating readable text in images (SDXL is terrible at this)
Photorealism it's noticeably better
Avoiding weird artifacts (fewer extra fingers!)
The catch: It's more expensive to train and requires more VRAM (20GB+ recommended). getimg.ai supports FLUX training for around $10~12 per model. Replicate added support recently. For local training, you'll want a 4090 or rent something beefy.
Worth it? If you're doing professional work or need the extra quality, yes. For personal projects or testing, SDXL is still excellent.
Final Thoughts
Training custom AI image generators has gone from "research lab only" to "weekend project" in about two years. It's wild how accessible this has become.
My actual recommendation path:
Start with Replicate. Train one model. See if it does what you need. If yes, you're done. If you need more control or are training dozens of models, explore the technical route. Don't overthink this just start with 15 photos and $3.
The technology will keep improving. FLUX.1 is better than SDXL. Something will be better than FLUX.1 in six months. Don't wait for the "perfect" model. Start now with what's available.
Good luck. And remember: your first model probably won't be perfect. Mine wasn't. That's fine. You learn by doing.