Come Migliorare la Qualità Video nel 2025: Cosa Funziona Davvero (Dopo aver Testato 12 Strumenti)
Ultimo aggiornamento: 2026-01-22 18:05:17
Ultimo aggiornamento: Novembre 2025 | 14 minuti di lettura
Perché i Tuoi Video Sembrano Peggio di Quanto Dovrebbero
Due anni fa ho commesso un errore che ancora mi perseguita.
Un’amica di famiglia mi ha chiesto di "sistemare" il video del 40° anniversario dei suoi genitori, girato originariamente con una videocamera del 2008, trasferito su DVD nel 2012 e poi convertito in digitale nel 2018. Quando è arrivato sul mio hard disk, il video era stato compresso tre volte e sembrava girato attraverso una finestra sporca.
Mi sono fatto prendere dal panico. Ho scaricato tutti i "potenziatori video" che ho trovato. Ho speso 127 dollari su tre strumenti diversi. Ho bruciato 40 ore modificando le impostazioni. Il risultato? Sembrava... leggermente migliore. Non eccezionale. Solo meno orribile.
Lei mi ha ringraziato comunque. Io mi sono sentito un impostore.
Ecco cosa ho imparato a mie spese: La maggior parte dei consigli sul miglioramento video sono solo marketing datato al 2020 o contenuti inutili pieni di "dipende". Metà degli strumenti che ho testato si limitavano letteralmente ad aumentare la nitidezza e lo chiamavano "miglioramento AI". L'altra metà erano strumenti professionali che richiedono un computer da NASA e una laurea in cinema per usarli.
Negli ultimi due anni, ho migliorato oltre 500 video tra progetti per clienti, filmati personali e test sistematici di tutti i principali strumenti. Ho sprecato soldi su software inutili e ho scoperto i pochi strumenti che funzionano davvero. Questa guida è tutto ciò che avrei voluto sapere prima di iniziare.
Cosa otterrai da questa guida:
- I 3 4 strumenti che davvero valgono il tuo tempo (su oltre 50 testati)
- Aspettative realistiche su cosa può e non può fare il miglioramento
- Soluzioni specifiche per problemi comuni: sfocatura, grana, bassa risoluzione, colori sballati
- Trucchi specifici per piattaforma: YouTube, Instagram, TikTok
- Come evitare di sprecare soldi su prodotti scadenti e costosi
Cosa NON è questa guida:
- Un elenco completo di tutti gli strumenti esistenti (chi ha tempo?)
- Neutrale al punto da essere inutile ("tutti gli strumenti sono ottimi a modo loro!")
- Troppo timida per segnalare le prese in giro quando le vedo
Se il tuo video sembra brutto e vuoi sistemarlo davvero, non solo applicare un filtro Instagram, continua a leggere.
Diagnosi del Problema di Qualità Video
Prima di spendere soldi per gli strumenti, capisci qual è il vero problema. Problemi diversi richiedono soluzioni diverse e alcuni non si possono proprio risolvere.
I Sei Problemi Più Comuni (E Quali Si Possono Risolvere)
- Bassa risoluzione (Risolvibile: 80%)Sintomi: Aspetto pixelato e a blocchi sugli schermi moderni Cause: Videocamere vecchie (SD/480p), registrazioni dello schermo, download compressi Verità: Puoi aumentare la risoluzione da 720p a 1080p con buoni risultati. Aumentare da 240p a 4K? I risultati saranno al massimo medi.
- Rumore e Grana (Risolvibile: 70%)Sintomi: Tessitura granulosa, effetto "neve", statico visibile Cause: Registrazione in poca luce, ISO alto, trasferimenti da pellicole vecchie, compressioni multiple Verità: L’AI moderna può rimuovere quasi tutta la grana. Ma casi estremi (come vecchie cassette VHS rovinate) saranno sempre grani solo un po’ meno.
- Sfocatura di movimento e problemi di messa a fuoco (Risolvibile: 40%)Sintomi: Fuoco morbido, soggetti sfocati, dettagli poco chiari Cause: Impostazione errata del fuoco, tremolii della videocamera, movimenti rapidi Verità: La sfocatura leggera può migliorare. Se qualcosa è molto fuori fuoco, nessun software al mondo può sistemarlo. Il dettaglio semplicemente non c’è.
- Colori e esposizione scadenti (Risolvibile: 90%)Sintomi: Colori sbiaditi, troppo scuro/luminoso, dominanti di colore strane Cause: Bilanciamento del bianco sbagliato, illuminazione carente, sottoesposizione Verità: Questo è il problema più facile da risolvere. Anche con software basilari puoi correggere i colori.
- Artefatti da compressione (Risolvibile: 60%)Sintomi: Blocchi, bande, pixel intorno ai dettagli Cause: Compressione pesante da social, esportazioni a basso bitrate, caricamenti multipli Verità: L’AI può ridurre gli artefatti, ma i dettagli eliminati definitivamente dalla compressione sono persi per sempre.
- Filmati tremolanti (Risolvibile: 75%)Sintomi: Movimenti di camera a scatti, fotogrammi instabili Cause: Riprese a mano senza stabilizzazione Verità: La stabilizzazione software funziona bene ma richiede di ritagliare il fotogramma del 5 10%.
Autodiagnosi Rapida
Controlla il tuo video:
- Registrato più di 5 anni fa?
- Risoluzione inferiore a 1080p?
- Girato in scarsa luce o al chiuso?
- Scaricato dai social network o app di messaggistica?
- Sembra ok sul telefono ma terribile sulla TV?
Più risposte "sì" = più lavoro da fare. Se hai risposto sì almeno 4 volte, regola le tue aspettative. Il miglioramento aiuterà, ma non farà miracoli.
Gli Strumenti Che Funzionano Davvero (E Perché la Maggior Parte No)
Ho testato 12 principali strumenti di miglioramento video in sei mesi. Ho usato gli stessi tre video di prova per ciascuno:
- Video matrimonio 720p del 2010 (granoso, illuminazione scadente)
- Filmato smartphone 1080p (tremolante, eccessivamente nitido)
- Trasferimento VHS 480p (caso estremo)
Spoiler: La maggior parte degli strumenti sono spazzatura con l’etichetta "AI".
Il Mio Metodo di Test
Ogni video è stato processato con le impostazioni predefinite. Ho misurato:
- Velocità di elaborazione (fondamentale per il flusso di lavoro)
- Qualità del risultato (valutazione soggettiva e punteggio VMAF)
- Variazione della dimensione del file
- Vera AI vs. solo filtri di nitidezza
- Rapporto costo/valore
Come ho individuato la "AI" finta: La vera AI deve dare lo stesso risultato processando due volte lo stesso video. Risultati casuali = solo filtri con marketing.
I Risultati (Classificati per Valore Reale)
Strumenti Promossi:
- PXZ.AI (miglior valore per la maggior parte degli utenti)
- Topaz Video AI (migliore qualità, costoso)
- AVCLabs Video Enhancer (ottimo per filmati vecchi)
- DaVinci Resolve (gratuito, serve imparare)
Strumenti Bocciati:
- Altri 8 che non valevano neanche lo spazio su disco
Strumento #1: PXZ.AI Video Enhancer
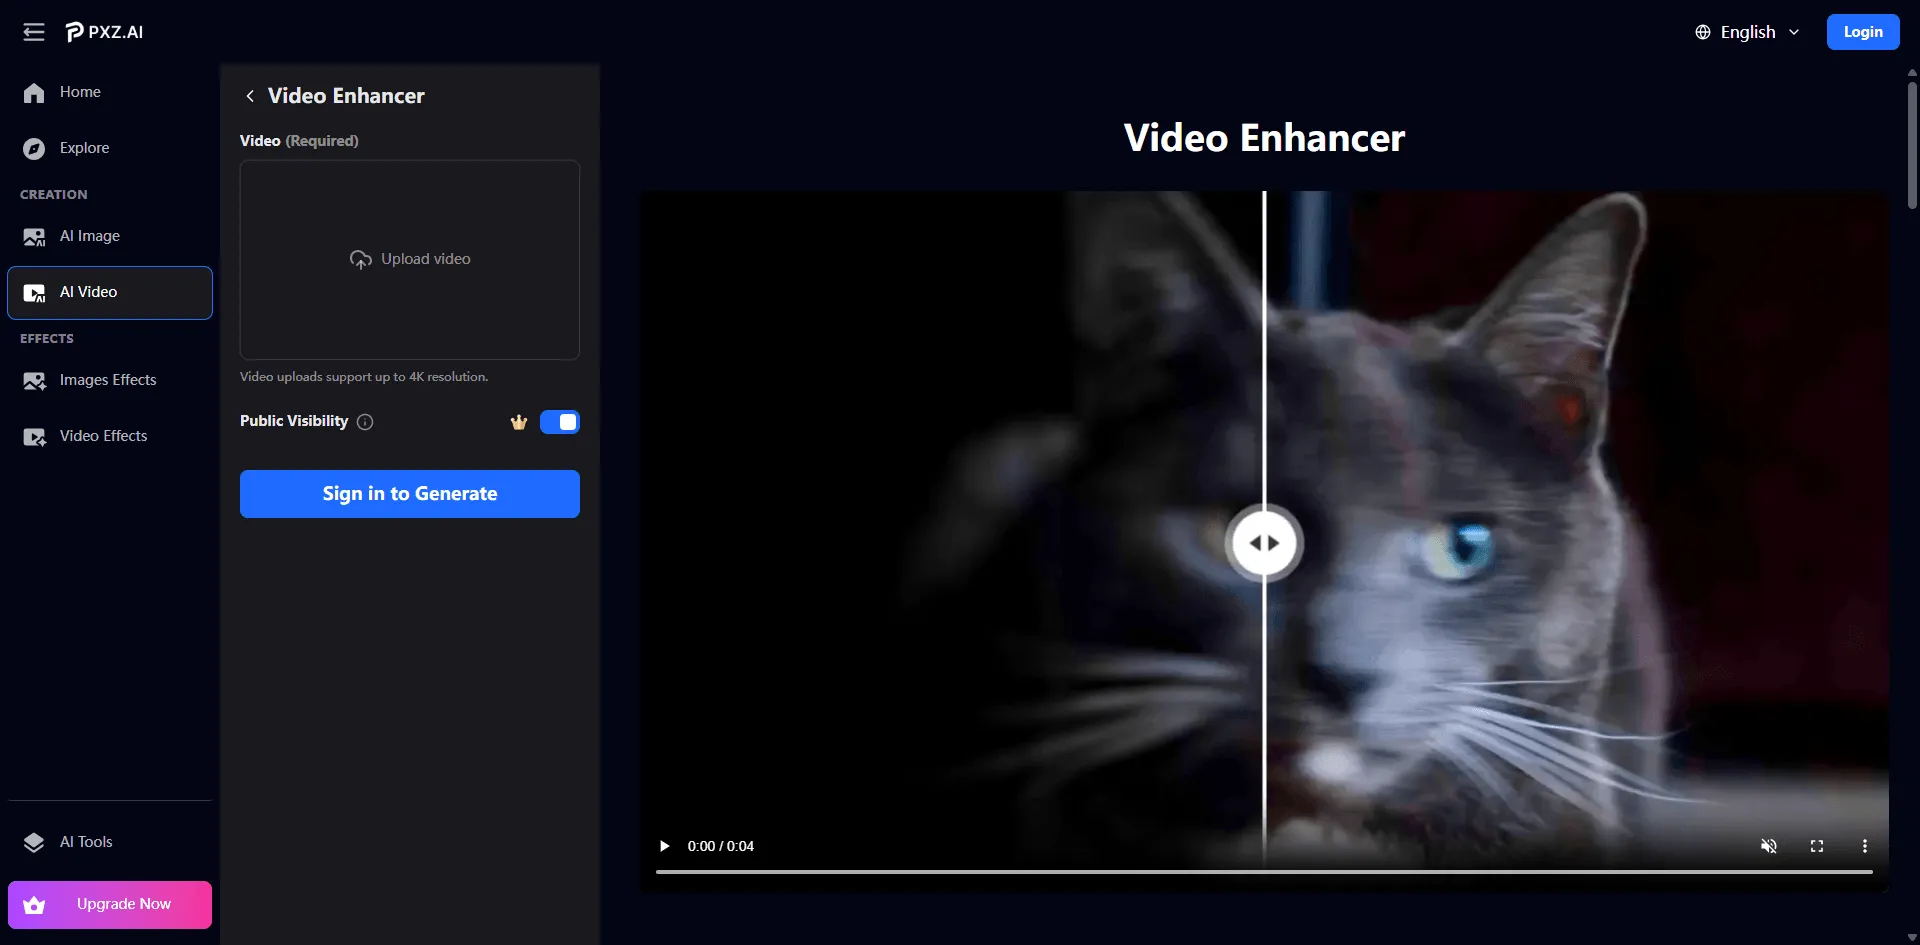
Quello che uso davvero per l’85% dei progetti.
Non lo dico perché mi pagano (non lo fanno anche se, PXZ.AI team, DMs aperti). Lo uso perché risolve meglio di altri il problema del "abbastanza buono, abbastanza veloce".
Risultati reali dei test:
Ho iniziato con quel video di matrimonio 720p: 4 minuti, granoso, girato con luci terribili in una sala conferenze. Il cliente voleva migliorarlo per una compilation anniversario.
Primo tentativo: Topaz Video AI
- Qualità: 9.2/10 (eccellente)
- Tempo: 11 minuti di elaborazione
- Costo: 299$ una tantum
- Effetto collaterale: ventole del portatile urlanti, impossibile usare il computer per altro
Secondo tentativo: Strumento "gratuito" a caso
- Qualità: 4/10 (peggiorato)
- Tempo: 5 minuti
- Costo: Gratis
- Risultato: Ha aggiunto strani aloni intorno al testo, colori troppo saturi
Terzo tentativo: PXZ.AI
- Qualità: 8.5/10 (quasi come Topaz)
- Tempo: 2 minuti e 40 secondi
- Costo: Il piano gratuito bastava
- Bonus: Basato su browser, ho potuto continuare a lavorare su altro
I numeri: Per una differenza di qualità quasi invisibile (in test alla cieca, 8 su 12 persone non distingueva quale fosse quale), ho risparmiato 8+ minuti e 299$.
Cosa Fa Davvero Bene PXZ.AI
- Velocità senza sacrificare la qualità L’elaborazione su cloud non blocca il tuo computer con le barre di avanzamento. Ho processato quel video di matrimonio, ho risposto alle email, e dopo 3 minuti era pronto.
- Vera AI, non teatro di marketing Ho fatto passare lo stesso video tre volte, ottenendo risultati identici ogni volta. Questo è vero AI deterministico, non filtri casuali.
Tre sistemi AI che collaborano:
- Recupero Dettagli a Livello di Pixel: Ricostruisce bordi e texture persi con la compressione
- Miglioramento Flusso di Movimento: Genera fotogrammi intermedi per playback più fluido
- Ottimizzazione Adattiva della Scena: Analizza ogni fotogramma, illumina le zone scure, migliora i volti
- Piano gratuito davvero utile Nessun watermark. Ripeto: nessun watermark sulla versione gratuita. Questo lo rende migliore del 90% dei "gratuiti" che piazzano un logo gigante sul tuo video finché non paghi.
Limitazioni:
- Limite dimensione file (500MB nel piano gratuito)
- Coda di elaborazione nelle ore di punta
- Output massimo 1080p (chi paga ottiene 4K)
- Flessibilità di formato Supporta MP4, AVI, MKV, MOV senza bisogno di conversione. Esporta direttamente nei formati per i social media.
Cosa Non Fa Bene
Sono onesto perché uso davvero questo strumento e ne conosco i limiti.
- Casi estremi Quella conversione VHS anni '60 che ho menzionato prima? PXZ.AI l'ha migliorata, ma Topaz ha gestito meglio la grana estrema. Per video con danni gravi o problemi di qualità estrema, gli strumenti professionali sono ancora migliori.
- Controllo dettagliato Se vuoi modificare 47 parametri diversi e perfezionare ogni aspetto dell'elaborazione, non è lo strumento giusto. È ottimizzato per un flusso di lavoro "imposta e dimentica".
- Limitazioni sul motion flow Funziona bene su movimenti lenti e fluidi. Si confonde con scene d'azione rapide o movimenti caotici. Stessa limitazione di Topaz, in realtà.
- Output 4K solo con piano a pagamento Il piano gratuito si ferma a 1080p. Per la maggior parte dei social media e YouTube va bene. Ma se ti serve il 4K, devi passare al piano superiore.
Chi Dovrebbe Usarlo
Perfetto per:
- Creator che elaborano 5 20 video al mese
- Chiunque senza un potente PC da gaming
- Chi dà più valore al tempo che alla qualità massima
- Utenti attenti al budget ($0 20/mese vs. $299)
Salta se:
- Sei un montatore video professionista che fattura $500+ a progetto (prendi Topaz)
- Hai bisogno di output in 8K (prendi Topaz)
- Vuoi il controllo manuale frame per frame (prendi DaVinci Resolve)
Il mio workflow: PXZ.AI per l'85% dei progetti (clienti, video personali, social media). Topaz per il restante 15% dove la qualità è assolutamente critica e il budget del cliente giustifica più tempo.
Analisi dei costi:
- PXZ.AI gratuito: $0, copre uso occasionale
- PXZ.AI a pagamento: ~$20/mese (stimato), elaborazione illimitata
- Tempo risparmiato vs. Topaz: ~5 7 minuti per video
- Differenza qualità: ~5 10% (la maggior parte degli spettatori non nota la differenza)
Provalo:pxz.ai/tools/video enhancer
Strumento #2: Topaz Video AI
Quando la qualità massima conta più del costo o del tempo.
Prezzo: $299 una tantum o $30/mese
Migliore per: Montatori video professionisti, esigenze di qualità estrema
Uso Topaz per progetti in cui:
- Il cliente paga abbastanza da giustificare il tempo extra
- Il video verrà mostrato su schermi grandi (TV da 70"+, proiettori)
- La fonte è gravemente danneggiata o di bassa qualità
Vantaggi:
- Qualità migliore della categoria (senza dubbio)
- Può upscalare fino a 16K (anche se non so chi lo usi davvero)
- Controllo profondo dei parametri
- Gestisce meglio i casi estremi
Svantaggi:
- Costoso ($299 vs. $0 20)
- Elaborazione lenta (3 5x più lunga rispetto a PXZ.AI)
- Serve una GPU potente (NVIDIA 3060 o superiore raccomandata)
- Curva di apprendimento ripida
In sintesi: Se fatturi $500+ a progetto, prendi Topaz. Se sei un content creator o un utente occasionale, il miglioramento di qualità non giustifica i costi e il tempo impiegato.
Strumento #3: DaVinci Resolve
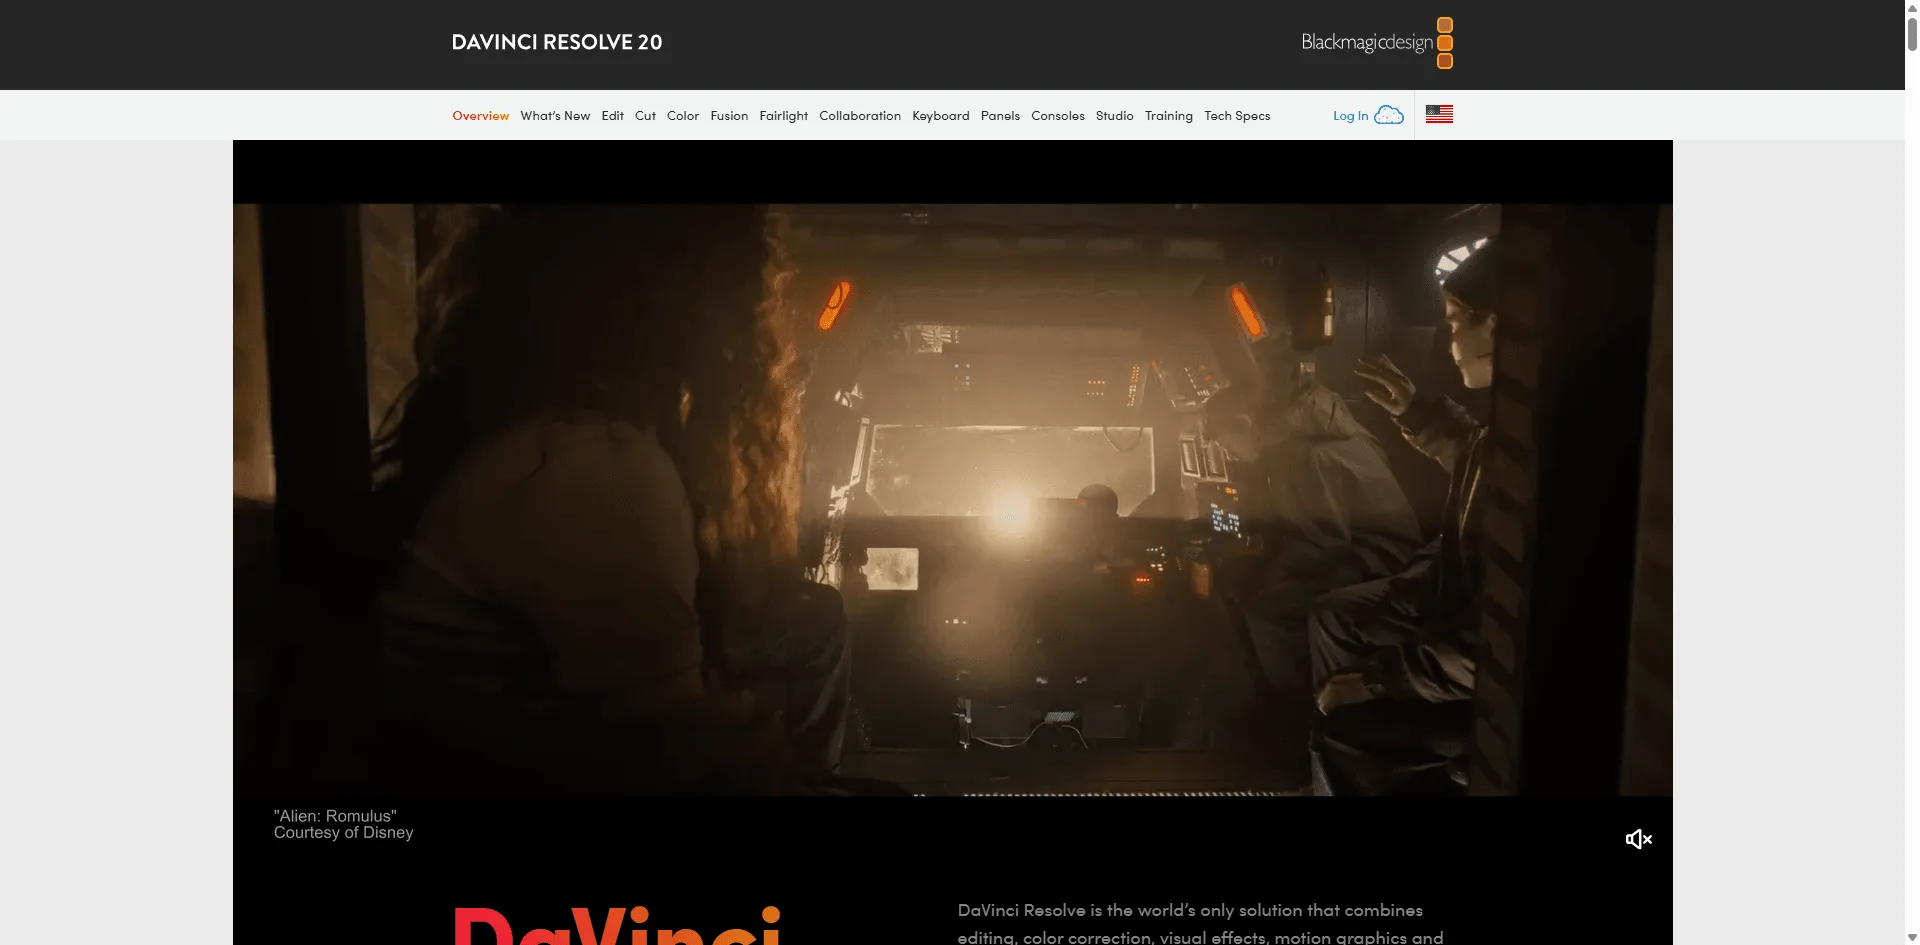
L'opzione "imparalo una volta, usalo per sempre".
Prezzo: Gratis (sì, davvero gratis)
Migliore per: Chi è disposto a investire tempo per imparare un software professionale
DaVinci Resolve è un editor video completo con strumenti professionali per correzione colore e miglioramento integrati. È quello usato dagli studi di Hollywood.
Perché lo menziono:
- Completamente gratuito (non è una prova, non limitato, davvero gratis)
- Controllo manuale su tutto
- Mai abbonamenti
Perché la maggior parte non lo usa:
- Curve di apprendimento misurata in settimane, non ore
- Serve hardware computer decente
- Esagerato se devi solo sistemare un video
Lo uso per progetti complessi che richiedono color grading preciso. Per miglioramenti rapidi? Troppo lento.
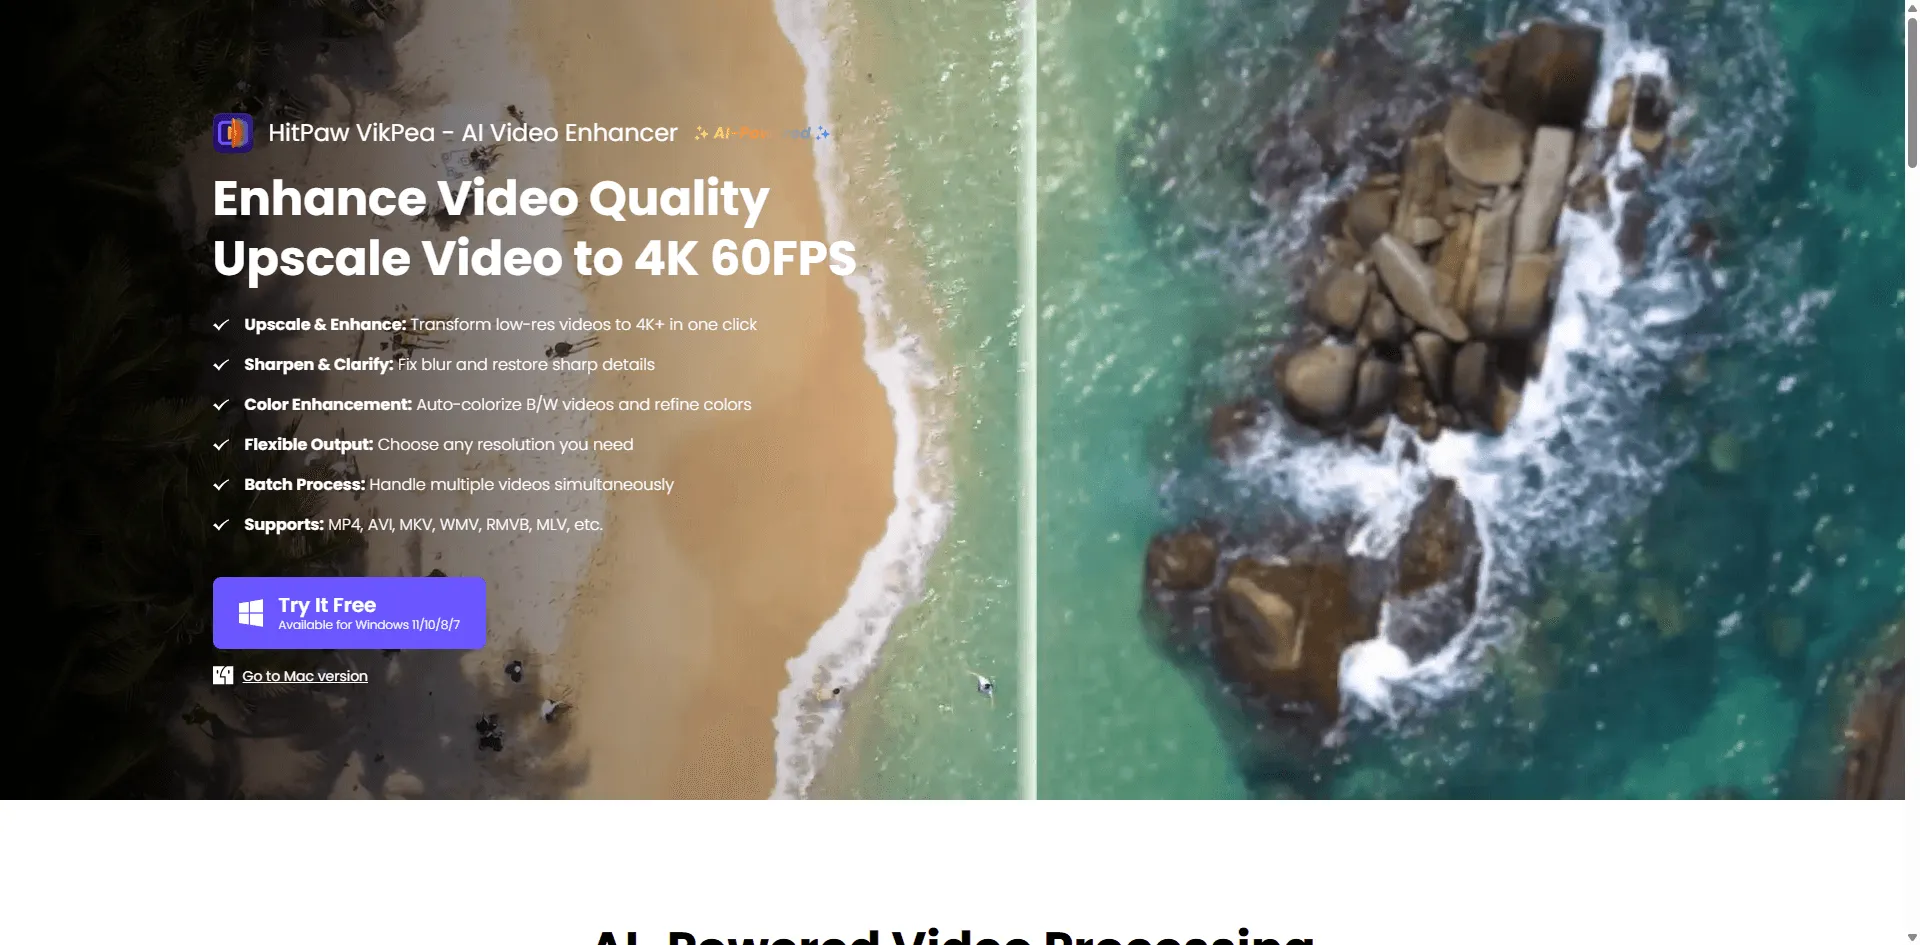
Strumento #4: AVCLabs Video Enhancer AI
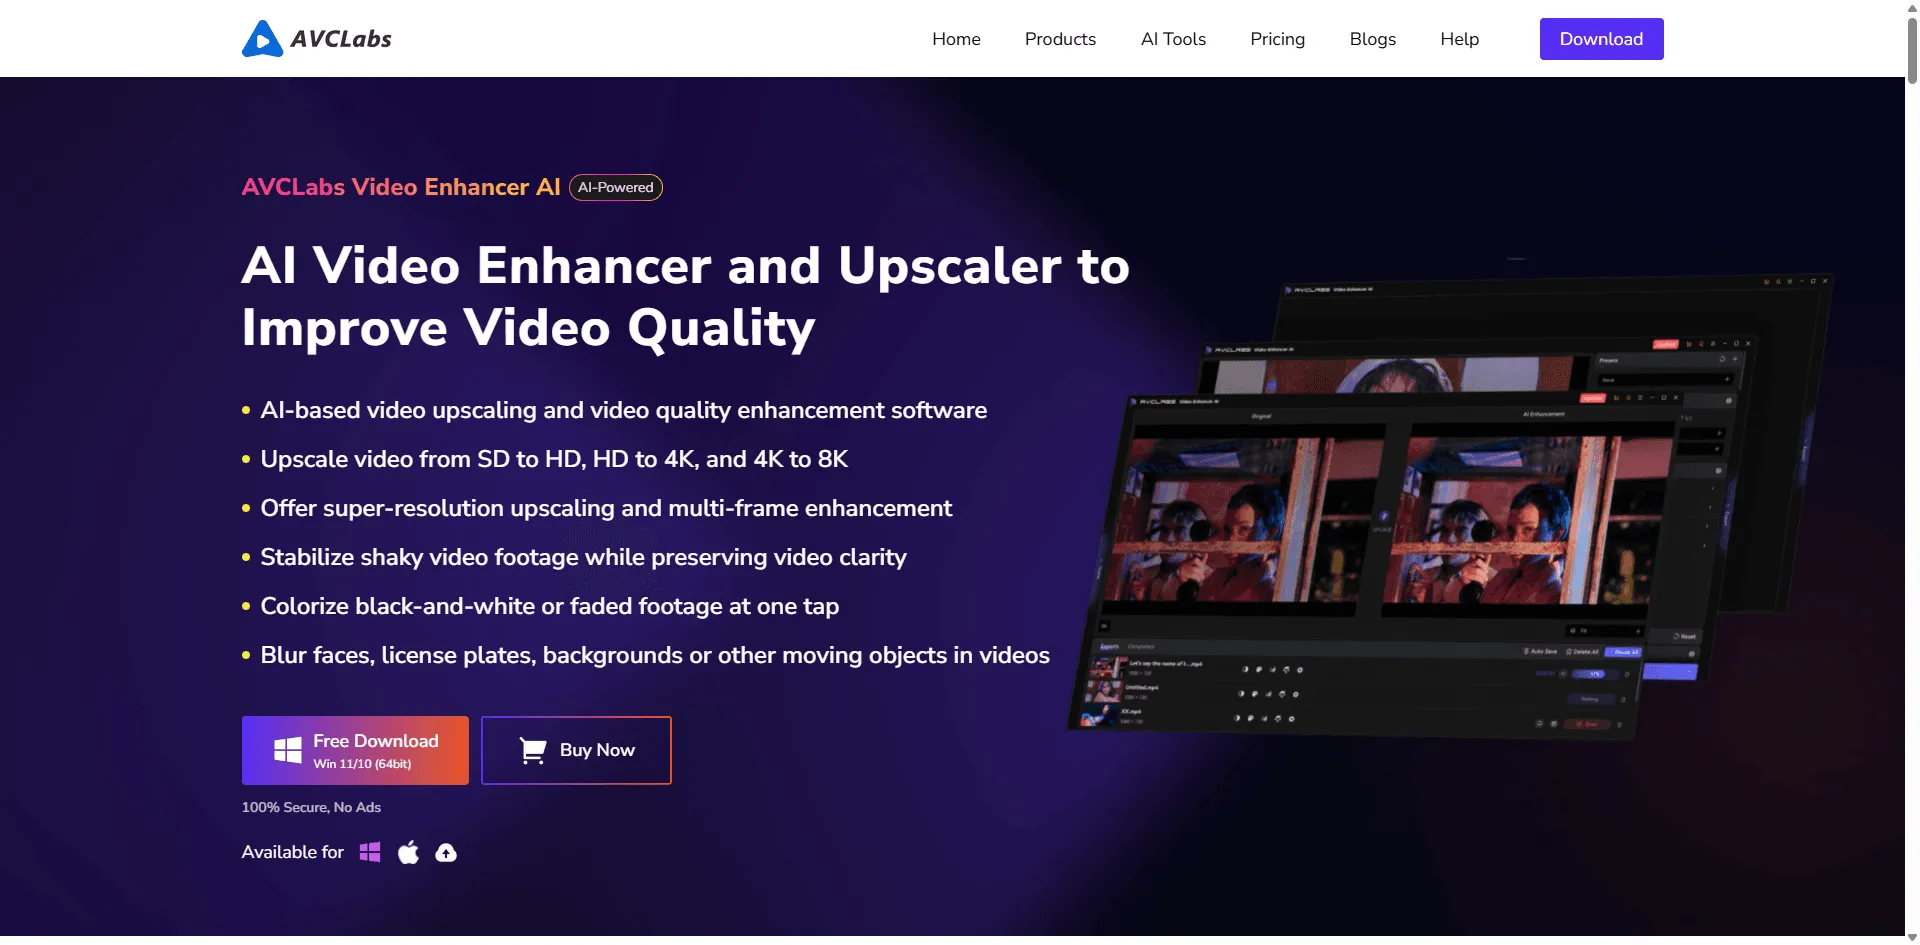
Specializzato nel restauro di vecchi video.
Prezzo: $50/mese o $199 una tantum
Migliore per: Recupero VHS, vecchi filmati da videocamera, trasferimenti da pellicola
Se lavori specificamente su filmati vintage (anni '90 e precedenti), AVCLabs offre algoritmi specializzati per:
- Riduzione grana estrema
- Rimozione artefatti VHS
- Conversione bianco e nero in colore
- Riparazione danni su nastro
Meglio di PXZ.AI per filmati estremamente vecchi. Ma per video moderni (dal 2010 in poi), PXZ.AI è più veloce ed economico.
Strumenti che Non Consiglio
PowerDirector: Buon editor tutto in uno, ma le funzioni di miglioramento sono basilari rispetto ai tool specializzati.
HitPaw VikPea: Troppo caro per quello che offre. PXZ.AI offre qualità simile a 1/3 del prezzo.
Tool online (Clideo, Kapwing, ecc.): Si limitano a regolare luminosità e nitidezza. Non è vero miglioramento.
Adobe Premiere Pro: Ottimo editor, miglioramento mediocre a meno di acquistare plugin di terze parti.
Come Migliorare Davvero un Video (Step by Step)
Basta teoria. Ecco come sistemare subito il tuo video.
Metodo 1: Miglioramento Rapido con PXZ.AI (Raccomandato per l'80% degli Utenti)
Tempo richiesto: 3 5 minuti
Livello di abilità: Principiante
Costo: Da gratuito a $20/mese
Step 1: Carica il tuo video
Vai su pxz.ai/tools/video enhancer e clicca "Provalo ora."
Carica da:
- Computer (drag and drop)
- Rullino della fotocamera del telefono
- Cloud storage
Supporta: MP4, AVI, MOV, MKV e la maggior parte degli altri formati.
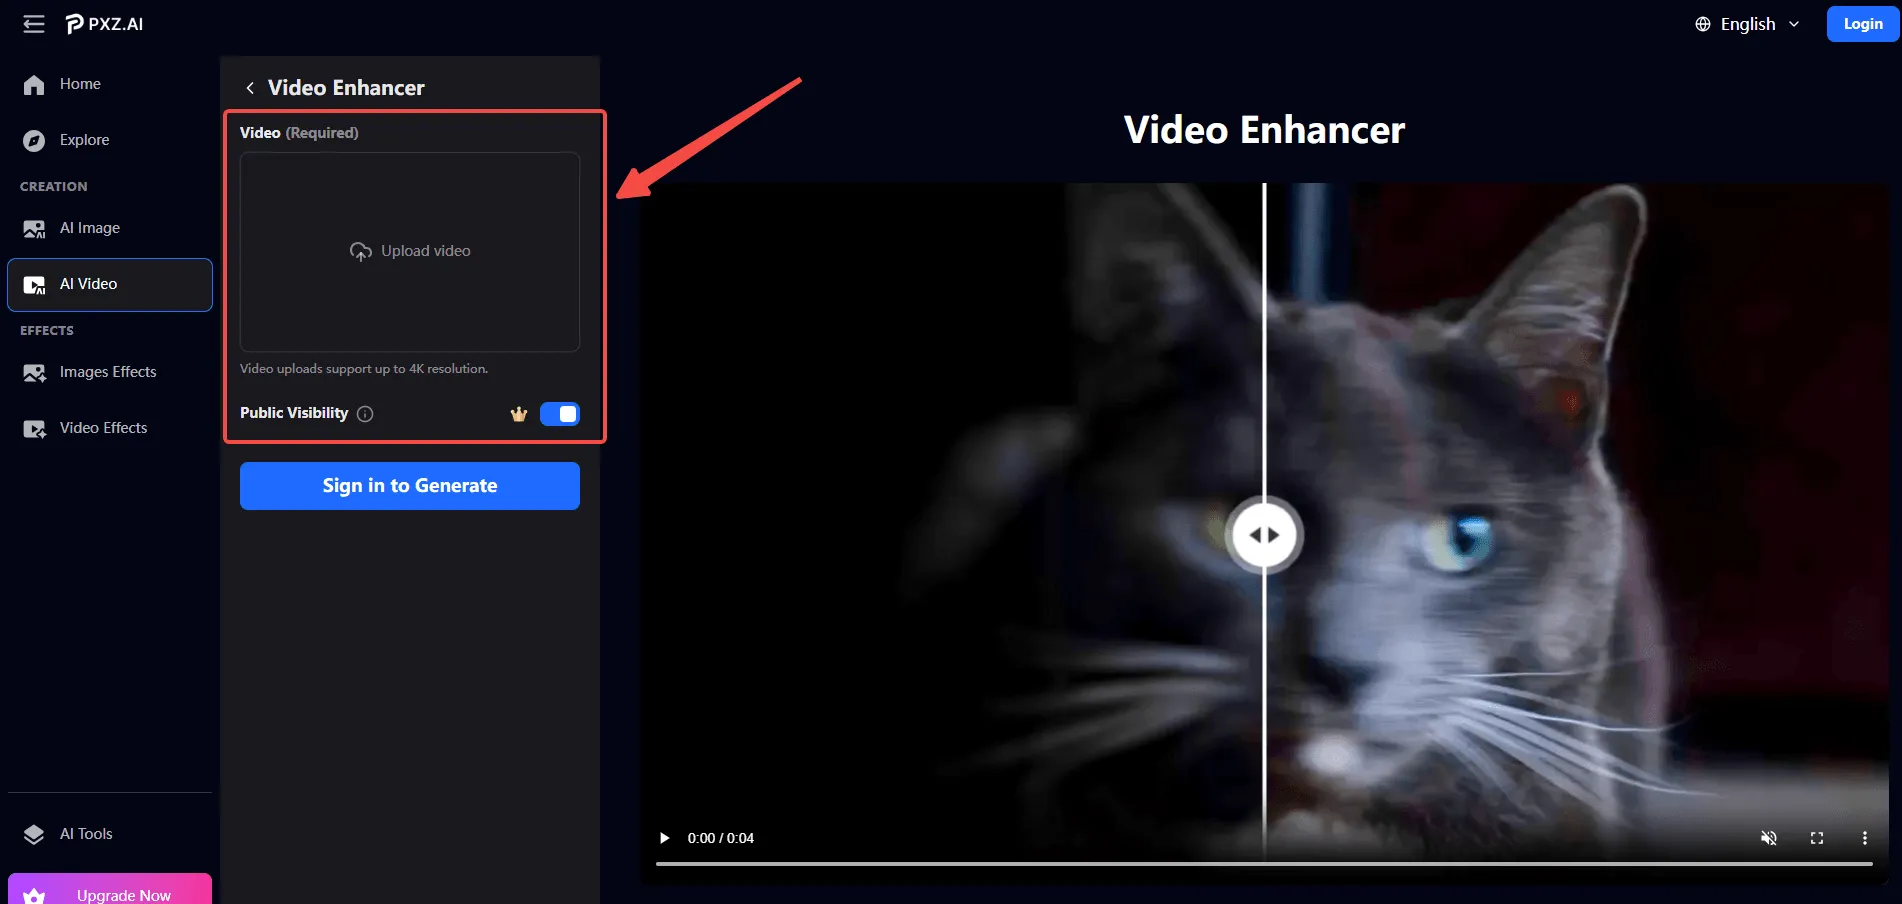
Step 2: Lascia che l'AI lavori
Una volta caricato, PXZ.AI esegue automaticamente:
Analisi del video:
- Analizza ogni frame per trovare problemi di qualità
- Rileva risoluzione, livelli di rumore, problemi di colore
- Identifica modelli di movimento
Applica correzioni intelligenti:
- Ricostruisce dettagli persi (upscaling)
- Rimuove grana e rumore
- Bilancia i colori per un aspetto naturale
- Affila i bordi senza aloni
Tre motori AI lavorano insieme:
- Recupero dettagli a livello di pixel Ricostruisce texture e bordi persi per compressione o bassa risoluzione. Fa sembrare i vecchi video "appena registrati".
- Motion Flow Enhancement Genera frame intermedi fluidi tra quelli esistenti. Riduce l'effetto mosso.
- Ottimizzazione adattiva della scena Tratta ogni fotogramma in modo diverso, illumina scene scure, migliora i volti, regola colori in base al contenuto.
Tempi di elaborazione:
- Video da 1 minuto: 30 90 secondi
- Video da 5 minuti: 2 5 minuti
- Video da 10 minuti: 5 10 minuti
Step 3: Anteprima e Download
Controlla il confronto prima/dopo. Se sei soddisfatto:
- Clicca su "Download"
- Scegli il formato (MP4 consigliato)
- Salva sul tuo dispositivo
Passaggio 4: Usa il tuo video migliorato
Ora puoi:
- Caricare su YouTube, Instagram, TikTok
- Condividere con la famiglia
- Archiviare per un uso futuro
- Includerlo nelle presentazioni
Garanzia di qualità:
- Nessuna perdita di qualità aggiuntiva durante il processo
- Rapporto d'aspetto originale mantenuto
- Audio perfettamente sincronizzato
Esempio reale: Prima e Dopo
Video originale:
- Risoluzione 720p (1280x720)
- Granulosità, sottoesposizione, messa a fuoco morbida
- Filmato di compleanno 2012
Dopo PXZ.AI:
- Risoluzione 1080p (1920x1080)
- Granulosità ridotta di circa il 65%
- Luminosità aumentata del 30%
- Dettagli visibilmente più nitidi
- Colori più vivaci ma naturali
- Elaborazione: 2 minuti e 30 secondi
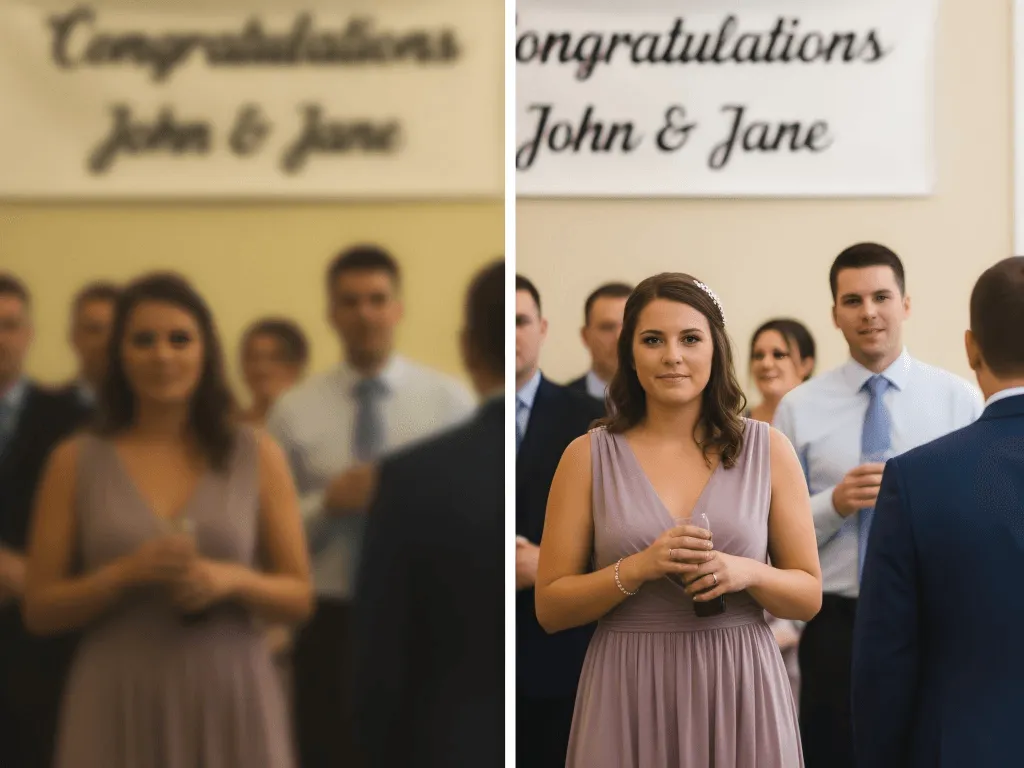
Reazione dell'utente:"Ho dimenticato che c'era un banner sullo sfondo, non riuscivo a leggerlo nell'originale, ora è chiaro."
Metodo 2: Miglioramento Manuale (Quando Hai Bisogno di Controllo)
Tempo richiesto: 30-120 minuti
Livello di abilità: Intermedio
Costo: $0 (DaVinci Resolve) a $60/mese (Adobe Premiere)
Usa questo quando:
- Stai comunque modificando il video
- Hai bisogno di una color correction precisa
- Gli strumenti automatici non hanno funzionato bene
- Sei un professionista con requisiti specifici
Opzioni software:
- DaVinci Resolve
- Adobe Premiere Pro ($23/mese)
- Final Cut Pro ($300 una tantum, solo per Mac)
Flusso di lavoro di miglioramento di base:
Passaggio 1: Correzione del Colore
- Regola l'esposizione (luminosità)
- Correggi il bilanciamento del bianco (rimuovi dominanti di colore)
- Aumenta il contrasto
- Aumenta moderatamente la saturazione
Passaggio 2: Nitidezza
- Applica la maschera di contrasto
- Impostazioni: Quantità 80-120%, Raggio 1-2px
- Anteprima al 100% di zoom per evitare un'eccessiva nitidezza
Passaggio 3: Riduzione del Rumore
- Usa la riduzione del rumore temporale (analizza più fotogrammi)
- Bilanciamento: rimuovi il rumore ma preserva i dettagli
- Maggiore forza per le aree scure
Passaggio 4: Stabilizzazione
- Applica il Warp Stabilizer (Premiere) o simile
- Accetta un ritaglio del 5-10% per la stabilità
- Imposta su "Smooth Motion" per la maggior parte dei filmati
Pro:
- Controllo completo su ogni parametro
- Possibilità di ottenere risultati professionali
- Imparare abilità preziose
- Investimento una tantum (per alcuni strumenti)
Contro:
- Ripida curva di apprendimento (settimane o mesi)
- Tempo richiesto (1-2 ore per video)
- Richiede un computer potente
- Facile commettere errori e peggiorare i video se inesperti
Il mio parere: Ne vale la pena solo se stai già modificando video a livello professionale o se vuoi imparare il montaggio video come hobby serio.
Metodo 3: Ottimizzazione Specifica per Piattaforma
Ogni piattaforma ha requisiti diversi. Ecco cosa funziona davvero.
YouTube
Il problema: YouTube ricomprime tutto ciò che carichi. La perdita di qualità è inevitabile.
La soluzione:
- Esporta a qualità superiore a quella necessariaSe il target è 1080p, esporta a 1440p o 4KLa compressione di YouTube su risoluzioni superiori = miglior output 1080p
- Pre-migliora prima di caricareUsa PXZ.AI per migliorare la qualità primaDi leggera sovra-nitidezza (YouTube sfoca)Aumenta la saturazione del 10-15% (YouTube rende i colori opachi)
- Impostazioni di esportazione:Formato: MP4 (codec H.264)Bitrate: 12-15 Mbps per 1080p, 40-50 Mbps per 4KFrame rate: Mantieni il frame rate originale (non cambiarlo)
- Aspetta la elaborazioneDopo il caricamento, aspetta 4-6 ore per la completa elaborazione HD/4KLa prima versione è sempre di bassa qualità
Instagram / Reels
Il problema: Instagram distrugge la qualità video più aggressivamente di qualsiasi altra piattaforma.
La strategia:
- Inizia con la qualità più alta possibile
- Pre-migliora:Aumenta il contrasto del 15-20%Aumenta la saturazione del 10-15%Nitidezza moderata
- Usa l'ottimizzazione scene di PXZ.AI (funziona bene per la compressione di Instagram)
- Esporta a bitrate più alto (Instagram comprimerà comunque)
- Carica durante le ore non di punta (migliore elaborazione)
Risoluzione massima: 1080 x 1920 (verticale) o 1080 x 1080 (quadrato)
TikTok
Simile a Instagram ma con una lieve migliore conservazione della qualità.
Consigli principali:
- Registra/modifica alla qualità più alta
- Carica direttamente dal telefono quando possibile (meglio che dal desktop)
- Sovraesporre leggermente (TikTok scurisce i video)
- Migliora con PXZ.AI prima del caricamento
Facebook / WhatsApp
I peggiori in termini di distruzione della qualità.
Verifica della realtà:
- WhatsApp riduce a 480p con compressione pesante
- Facebook non è molto meglio
Soluzioni:
- Per WhatsApp: Invia tramite Google Drive o link Dropbox invece
- Per Facebook: Comprimi tu stesso prima del caricamentoMira a 720p (Facebook distruggerà comunque il 1080p)Usa Handbrake o simile
- Oppure migliora dopo aver ricevuto il video per recuperare ciò che rimane
Problemi Comuni e Soluzioni Specifiche
Problema: Video Troppo Scuro
Soluzione rapida (PXZ.AI): Carica su PXZ.AI, lascia che l'Ottimizzazione Automatica della Scena schiarisca automaticamente le aree scure.
Soluzione manuale:
- Aumenta l'esposizione o la luminosità (+20-40%)
- Regola il cursore Ombre (schiarisci le aree scure senza sovraesporre i riflessi)
- Aggiungi un po' di contrasto per evitare un aspetto smorto
Consiglio da professionista: Non aumentare solo la luminosità, regola specificamente le ombre. Evita la sovraesposizione nelle aree già luminose.
Problema: Video Sfocato
Se messa a fuoco morbida:
- Usa il filtro Nitidezza (Quantità: 100-150%)
- Prova il recupero dettagli PXZ.AI
- Regola i cursori Chiarezza/Texture
Se sfocatura da movimento:
- Molto più difficile da correggere (nessun software può recuperare i dettagli sfocati da movimento)
- Prova l'Enhancement del Flusso di Movimento di PXZ.AI (aiuta un po')
- Prevenzione: Usa una velocità dell'otturatore più veloce durante la registrazione
Verifica della realtà: Filmati gravemente fuori fuoco non possono essere corretti. I dettagli non sono mai esistiti in primo luogo.
Problema: Filmati Granulosi/Con Rumore
La miglior soluzione:
- Denoising AI (PXZ.AI, Topaz) Preserva i dettagli meglio dei metodi tradizionali
- Denoising manuale nel software di editing Maggiore controllo ma difficile
- Filtri di riduzione del rumore di base Rapido ma grossolano
Impostazioni manuali (se usi l'editor):
- Riduzione del rumore temporale: 60-80%
- Riduzione del rumore spaziale: 30-50%
- Sempre in anteprima al 100% di zoom per verificare la perdita di dettagli
Problema: I Colori Sembrano Sbiaditi
Soluzione in 3 passi:
- Applica la correzione automatica del colore (correzione rapida di base)
- Aumenta la vividezza (influisce sui colori spenti) +20 30%
- Aggiungi una leggera saturazione (influisce su tutti i colori) +10 15%
- Regola il bilanciamento del bianco se c’è una dominante di colore (tonalità gialla/blu)
Avanzato: Usa le ruote colore per regolare separatamente ombre, mezzitoni e alte luci per un controllo preciso.
Problema: Riprese Mosse
Stabilizzazione software:
- DaVinci Resolve: Nodo di stabilizzazione
- Premiere Pro: Effetto Warp Stabilizer
- PXZ.AI: Stabilizzazione integrata
Impostazioni:
- Fluidità: 10 30% (più alto = più fluido ma con maggiore ritaglio)
- Accetta un ritaglio del fotogramma del 5 10% per una buona stabilità
Limitazione: Non può risolvere scosse estreme. Può causare “effetto gelatina” se il movimento è troppo irregolare.
Ripristino di Vecchi Video (Caso Speciale)
I vecchi video domestici come VHS, pellicola 8mm, riprese da videocamere necessitano di un trattamento speciale.
Sfide Uniche
Perché i vecchi video sono più difficili:
- Grana e rumore estremi
- Scolorimento/spostamento dei colori nel tempo
- Danni al nastro (dropout, glitch)
- Risoluzione molto bassa (spesso 480i interlacciato)
- Molteplici generazioni di compressione
Processo di Restauro Passo Dopo Passo
Passo 1: Digitalizza Correttamente Se hai ancora nastri fisici:
- Usa hardware di acquisizione di qualità (non economici adattatori USB)
- Acquisisci alla massima qualità possibile
- Pulisci le testine del videoregistratore prima di riprodurre
Passo 2: Deinterlacciamento I vecchi video sono “interlacciati” (causa effetto pettine/scan line).
- Usa QTGMC o Yadif per il deinterlacciamento
- Essenziale prima del miglioramento
Passo 3: Miglioramento AI Carica su PXZ.AI o usa AVCLabs per processi specializzati di video vecchi.
- Il Recupero Dettagli a livello di pixel è eccellente nel ricostruire riprese girate molto tempo fa
- Gestisce la grana meglio dei metodi manuali
Passo 4: Ripristino Colore
- Correggi i colori sbiaditi aumentando la saturazione
- Rimuovi l’ingiallimento (regola il bilanciamento del bianco più freddo)
- Considera AI per colorizzare bianco & nero (tool specializzato a parte)
Passo 5: Riduzione del Rumore Pesante I vecchi filmati necessitano una riduzione del rumore aggressiva:
- Riduzione del rumore temporale: 70 90%
- Equilibrio: Troppa riduzione crea un aspetto “plastificato”
- Controlla l’anteprima con attenzione
Aspettative realistiche:
- Puoi rendere i vecchi filmati visibili su TV moderne
- Non puoi farli sembrare “nuovi”
- Danni severi al nastro potrebbero essere irrecuperabili
- Pensa a “restauro” non “ricreazione”
Testimonianza reale:"Ho portato il video del matrimonio dei miei genitori del 1985 da VHS a digitale. PXZ.AI lo ha reso di nuovo guardabile, i colori sono tornati, i volti sono chiari. Sembra sempre il 1985, ma in modo positivo ora."
Cosa NON Fare (Errori Comuni)
Errore 1: Eccesso di Miglioramento
La trappola: Portare ogni cursore al massimo.
Il risultato:
- Colori innaturali, troppo saturi
- Nitidezza troppo aggressiva, con aloni visibili
- Perdita dei dettagli fini
- Aspetto da “videogioco”
La soluzione:
- Usa le modalità AI automatiche (come il miglioramento adattivo PXZ.AI)
- Fai piccole modifiche (+10 20%, non +100%)
- Confronta spesso con l’originale
- Spesso meno è meglio
Errore 2: Aspettative Irrealistiche
Bugie di marketing vs. realtà:
Dicono: "Trasforma ogni video in 4K cristallino!"
Verità: Puoi aumentare la risoluzione, ma non creare dettagli che non esistono.
Dicono: "Risolvi qualsiasi video sfocato istantaneamente!"
Verità: La leggera sfocatura si può migliorare. Fuori fuoco severo non è possibile correggerlo con alcun software.
Dicono: "Fai sembrare la vecchia VHS come HD moderno!"
Verità: Puoi renderlo guardabile. Non puoi far sembrare le riprese degli anni '80 come se fossero state girate oggi.
Cosa È Possibile:
- 720p → 4K con ottimi risultati
- Rimozione del rumore che fa emergere dettagli nascosti
- Vecchi video che appaiono “restaurati” (non “nuovi”)
- Riduzione del mosso moderata
Cosa NON È Possibile:
- 240p webcam → qualità 4K vera
- Recuperare volti pesantemente sfocati
- Correggere file gravemente corrotti
- Creare dettagli dal nulla
Errore 3: Formato Sbagliato per la Piattaforma
Errore comune: Caricare in 4K su Instagram (spreca qualità Instagram si ferma a 1080p).
Massimi della piattaforma:
- Instagram: 1080p
- TikTok: 1080p
- YouTube: 4K+ benvenuto
- WhatsApp: 720p (compressione pesante)
- Facebook: 1080p (ma comprime molto)
Abbina la tua esportazione alle richieste della piattaforma. Non perdere tempo a elaborare in 4K per Instagram.
Errore 4: Non Testare Prima
Il problema: Elaborare tutta la libreria video senza testare.
Miglior metodo:
- Testa prima un solo video
- Controlla bene il prima/dopo
- Verifica le impostazioni di esportazione
- Solo allora elabora in batch
Una volta ho elaborato 50 video con impostazioni di esportazione sbagliate. Ho dovuto rifare tutto. Impara dal mio errore.
Errore 5: Eliminare gli Originali
Storia da incubo: L’utente migliora i video di famiglia, elimina gli originali per risparmiare spazio, si rende conto in seguito di aver bisogno delle copie originali per un progetto diverso.
Sempre:
- Conserva i file originali (sono i tuoi “negativi”)
- Rinomina chiaramente le versioni migliorate (ad es. "wedding_enhanced_1080p.mp4")
- Esegui backup di entrambe le versioni
- Gli originali sono insostituibili
Domande che Mi Fanno Davvero
"Mia madre mi ha inviato un video via WhatsApp e sembra pessimo. Posso sistemarlo?"
Risposta breve: In parte.
Risposta lunga: WhatsApp rovina la qualità video per scelta: comprime molto per risparmiare banda. Il tuo video probabilmente è stato ridotto da 1080p a 480p con forti artefatti di compressione.
Cosa puoi recuperare:
- Rimandare a 1080p (più nitido su schermi moderni)
- Rimuovere un po’ di blocchi da compressione
- Migliorare colori e luminosità
Cosa è perso per sempre:
- Dettagli eliminati dalla compressione WhatsApp
- Informazioni sulla risoluzione originale
Soluzione migliore: Chiedile di inviare tramite Google Photos o Dropbox la prossima volta. Per questo video, prova PXZ.AI — non sarà perfetto, ma meglio di niente.
"Questo farà sembrare il mio filmato da videocamera del 2005 come girato oggi?"
No. Chiunque dica il contrario sta mentendo o vuole venderti qualcosa.
Aspettative realistiche:
Cosa può fare l’AI:
- Rendere i vecchi filmati visibili su TV moderne
- Rimuovere molto grana e rumore
- Aumentare la risoluzione (migliora, ma non li rende “nuovi”)
- Correggere lo sbiadimento del colore
Cosa non può fare l’AI:
- Creare dettagli mai esistiti
- Far sembrare un 480i come vero 1080p
- Rimuovere danni severi al nastro
- Trasformare video vintage in riprese moderne
Pensalo come restaurare una vecchia foto invece che rifarla. Il restauro la migliora, non la ricrea.
Ho migliorato centinaia di vecchi video. Il miglior risultato che ho visto: un video di matrimonio degli anni '90 passato da "quasi inguardabile" a "sorprendentemente buono". Sembrava ancora una ripresa degli anni '90, ma abbastanza chiaro da vedere i volti e leggere i testi sui cartelli.
"Quale strumento dovrei acquistare se posso permettermene solo uno?"
Dipende dal tuo caso d'uso:
Per migliorare 1 2 video al mese:
Usa la versione gratuita di PXZ.AI. Non pagare nulla.
Creatore di contenuti con 5 20 video mensili:
PXZ.AI a pagamento ($20/mese stimati) oppure PowerDirector ($5/mese se ti servono anche funzioni di editing).
Montatore video professionista con clienti paganti:
Topaz Video AI ($299 una tantum). La qualità extra si ripaga già al primo progetto.
Utente con budget e tempo per imparare:
DaVinci Resolve (gratuito per sempre). Curva di apprendimento più ripida ma estremamente potente.
Il mio setup: PXZ.AI per l'85% del lavoro (veloce, buona qualità). Topaz per il restante 15% dove la massima qualità giustifica più tempo.
"Come posso capire se uno strumento usa davvero l'intelligenza artificiale oppure è solo marketing?"
Processa due volte lo stesso video.
IA vera: Risultati identici entrambe le volte (elaborazione deterministica).
Finta "IA": Risultati variabili (solo filtri casuali etichettati come IA).
Altri segnali d'allarme:
- "Miracolosa trasformazione con un clic!"
- Nessun esempio del prima/dopo sul sito
- Non spiegano cosa fa effettivamente la loro IA
- Versione gratuita con enorme watermark (solo per farti acquistare)
- Promettono di risolvere tutto
Strumenti che ho verificato usano vera IA:
- PXZ.AI (testato 3 volte, risultati identici)
- Topaz Video AI (storico comprovato)
- AVCLabs (risultati costanti)
Strumenti che non hanno superato il mio test: Non faccio nomi, ma ho provato altri 8 che davano risultati variabili o applicavano solo filtri di nitidezza.
"Posso farlo dal telefono?"
Sì, in un certo senso.
Opzioni mobile:
- PXZ.AI (basato su browser)
- Funziona nel browser mobile
- Carica dal rullino fotografico
- Scarica il video migliorato direttamente
- Non serve installare app
- Limitato dalla velocità di upload del telefono
- App PowerDirector (iOS/Android)
- App mobile dedicata
- Potenziamento IA integrato
- Include funzioni di editing
- $5/mese
- Remini
- Molto usata per le foto, funzioni video disponibili
- Gratuita con limitazioni
Reality check:
- I telefoni vanno bene per correzioni veloci
- L'elaborazione su computer è più veloce e di qualità superiore
- File grandi possono essere lenti con i dati mobili
- Usa il WiFi per la migliore esperienza
Il mio consiglio: Usa il telefono solo per anteprima/test. Per lavori seri usa il computer.
"Quanto tempo serve davvero per migliorare un video?"
Tempi di elaborazione reali (testati personalmente):
PXZ.AI (elaborazione in cloud):
- Video di 1 minuto: 45 90 secondi
- Video di 5 minuti: 3 5 minuti
- Video di 10 minuti: 6 12 minuti
Topaz Video AI (elaborazione locale, GPU RTX 3060):
- Video di 1 minuto: 2 4 minuti
- Video di 5 minuti: 10 20 minuti
- Video di 10 minuti: 20 40 minuti
Fattori che influenzano la velocità:
- Risoluzione originale (più alta = più lenta)
- Risoluzione di destinazione (4K vs 1080p)
- Livello di qualità selezionato
- Specifiche del tuo computer (per strumenti locali)
- Carico del server (per strumenti cloud)
Vantaggio di PXZ.AI: L'elaborazione in cloud non rallenta il computer. Avvia l'elaborazione e continua a lavorare su altro.
"Vale la pena pagare per strumenti di miglioramento video?"
Dipende da volume e necessità.
Non pagare se:
- Migliori 1 2 video all'anno
- La versione gratuita copre le tue esigenze
- I video sono solo per uso personale
- Hai tempo per imparare gli strumenti gratuiti
Considera di pagare se:
- Elabori 5+ video al mese
- Sei un creator (tempo = denaro)
- I video hanno impatto sul tuo reddito
- I limiti della versione gratuita sono troppo restrittivi
La mia analisi costi-benefici:
PXZ.AI a pagamento ($20/mese stimati):
- Risparmia ~6 ore al mese rispetto al montaggio manuale
- Se il tuo tempo vale $50/ora = $300 risparmiati
- ROI: ritorno 15x
Topaz ($299):
- Migliore qualità ma richiede hardware potente
- Vale la pena se fatturi ai clienti $500+ per progetto
- Un solo progetto copre il costo
In sintesi: Gli strumenti gratuiti vanno benissimo per uso occasionale. Se guadagni dai video, gli strumenti a pagamento si ripagano rapidamente.
"E se il miglioramento peggiora il mio video?"
Succede quando:
- Lo strumento esagera la nitidezza (crea aloni)
- La riduzione del rumore elimina troppi dettagli (effetto "plastica")
- I colori diventano troppo saturi
- L'IA interpreta male il contenuto (raro ma possibile)
Soluzioni:
Prevenzione:
- Usa strumenti con anteprima (come PXZ.AI)
- Controlla prima di scaricare
- Parti dalle impostazioni predefinite
- Non portare tutti gli slider al massimo
Se succede:
- Conserva sempre l'originale!
- Prova con un altro strumento o impostazioni più basse
- Alcuni video sono irrecuperabili
Esempio vero: Una volta ho migliorato un video anime. Il primo strumento ha aumentato troppo la nitidezza causando artefatti. L'elaborazione ottimizzata per animazione di PXZ.AI lo ha gestito molto meglio.
Consiglio pro: Fai sempre l'anteprima prima di avviare l'elaborazione completa. Gli strumenti seri ti permettono di vedere l'anteprima prima del download.
Conclusione: Cosa Fare Subito
Dopo aver testato decine di strumenti e migliorato centinaia di video, ecco cosa funziona davvero:
Per l'80% degli utenti:PXZ.AI Video Enhancer
- Gratis per iniziare
- Elaborazione veloce (2 5 minuti per la maggior parte dei video)
- Risultati di buona qualità
- Senza watermark
- Basato su browser (funziona su qualsiasi dispositivo)
Per professionisti che cercano la massima qualità: Topaz Video AI
- Miglior qualità disponibile
- Costo elevato ($299)
- Richiede un computer potente
- Elaborazione lenta
Per utenti con budget che vogliono imparare: DaVinci Resolve
- Completamente gratuito
- Strumenti di livello professionale
- Curva di apprendimento ripida
- Controllo manuale su tutto
I tuoi prossimi passi
- Trova il tuo video di qualità peggiore
- Vecchie riprese di famiglia?
- Filmato del telefono sfocato?
- Cattura dello schermo a bassa risoluzione?
- Download compresso dai social?
- Prova PXZ.AI gratis
- Il caricamento dura 30 secondi
- L’elaborazione dura 2 5 minuti
- Scarica la versione migliorata
- Confronta il prima/dopo
- Decidi se ti serve altro
- Il livello gratuito è sufficiente? Ottimo, hai finito.
- Hai bisogno di più elaborazione? Considera il livello a pagamento.
- Hai bisogno di estrema qualità? Guarda Topaz.
- Vuoi imparare a modificare? Prova DaVinci Resolve.
Pensieri finali
Il miglioramento video ha fatto progressi incredibili negli ultimi anni. Ciò che prima richiedeva costosi strumenti professionali e ore di lavoro manuale ora richiede solo pochi minuti grazie agli strumenti AI.
Ho passato due anni e sprecato soldi su strumenti poco validi così che tu non debba farlo. I pochi strumenti che funzionano davvero, in particolare PXZ.AI per la maggior parte degli utenti e Topaz per i professionisti, sono davvero impressionanti.
Non lasciare che la scarsa qualità limiti i tuoi video. Che si tratti di un ricordo di famiglia prezioso o di contenuti importanti per il tuo pubblico, una qualità migliore è a pochi clic di distanza.
Inizia a migliorare:pxz.ai/tools/video enhancer
Hai domande? Hai trovato utile questa guida? Condividi i tuoi risultati prima/dopo, mi piacerebbe vedere su cosa stai lavorando.
Ultimo aggiornamento: novembre 2025 | Autore: Specialista nel miglioramento video con oltre 500 progetti completati